Pages

Wednesday, March 30, 2011

Simple melted spring scarf tutorial


I was scorned by OldNavy.com when the pretty Spring scarf I put in my virtual shopping cart was suddenly missing and was replaced by an unfriendly red "out of stock" message. So I viewed it as fate or karma, a few hours later, when this hip teenage girl cutting my fabric at JoAnn's told me how to make melted, gathered scarves.

Friends, this project is quick and simple, I promise. If you can sew one straight line on your machine, consider yourself a scarf maker. If I managed to do it from only a verbal explanation and with zero sewing skills, anyone can do it.


So here we go.


Supply List

  • Scissors
  • Tea light or candle and matches
  • Sewing machine
  • Elastic thread (I've found it at JoAnn's and Wal-Mart for less than $2.00. It is kept with the elastic products, not with the thread)


  • Fabric with polyester in it. Sheer fabric works the best but any silky-looking fabric with polyester in it works great as well. You'll need 1/2 yard for an adult scarf and 1/4 yard for a kid's scarf.

I used this sheer butterfly fabric from JoAnn's for my scarf.

I loved that it already had the embellishments sewn onto it and it was a great fabric to work with.

I wanted a gingham print for my daughter but couldn't find a sheer gingham fabric in stores or online (if you find any you MUST tell me where I can get it). So I took a chance on this poly/nylon gingham in lavender (it looks and feels like a light-weight taffeta and has a a little bit of sheen to it).

I like how it turned out. It's not your typical scarf material, but that adds to the charm.


Simple Melted Spring Scarf Tutorial


1. Wind your bobbin by hand with the elastic thread using some tension as you wind it. Then put the bobbin back in the machine and thread it as you normally do.


2. Thread your machine with regular cotton thread (only the bobbin needs elastic thread).

3. Cut your fabric into two long strips (don't worry about perfectly straight cuts). For the adult scarf, I cut my two strips each about 6 inches wide and 60 inches long (your scarf will shrink to approximately half the original length once it is sewn). Adjust it to the length and width that's right for your style and height.


4. Sew the two strips together at one end, leaving your self with one very long thin strip of fabric.

5. Light a tea light or candle and set it on a heat-safe, flat surface.

6. Hold the edge of your fabric in the flame to melt it. Continue melting the edges of your fabric around the entire perimeter of the scarf. This seals and finishes the edge (taking care of the fraying) with a unique look and without hemming and finishing it on a machine- hooray!


Notes about melting fabric: Don't be intimidated, after a little practice, it's quick and easy. If you've melted fabric flowers for other projects, you're already skilled for this job. I suggest practicing on a fabric scrap first. Sheer fabrics melt fast and ignite easily, so be careful and don't panic if it lights on fire, just blow it out and move on. Silky fabrics melt slower, but be careful not to hold them too close to the flame or you will melt a tiny hole in the fabric ( i have a few in mine, but when the scarf is finished, you can't see them.) The edges should be a bit curvy and uneven, that is the look you are going for, so please don't worry about messing it up.


7. Sew a straight stitch down the center of the entire length of fabric and watch it ruffle as you go.


(I added a second row of stitches on the gingham fabric because it wasn't ruffly enough with just the single row of stitching (the more rows of stitches, the tighter the ruffle will be). The sheer butterfly fabric was perfectly ruffled with just one row of stitches.)


8. Don your new Spring scarf and think about how clever you are on the inside and the out ;)


I'm linking this project to these tremendous blogs this week


Pretty, Simple Place Cards


{image from MarthaStewart.com}

Hi friends! Would you believe I just lost a whole tutorial to a bad internet connection? It's so frustrating! Deep breath. In lieu of my tutorial, check out these pretty printable place cards from Martha Stewart. I am using them for a party tonight. I'll have to show you how they turn out!

Monday, March 28, 2011

Versatile Blogger Award

My fabulous blogging friend, Natalie of NatSprat presented me this prestigious award - hooray! Thanks, friend!


If one is lucky enough to win this award, one must share seven things about her or his self, so here you go.

Seven Things About Me


1) I have a crush on Nate Berkus' hair

2) My favorite color is pink- always has been, always will be

3) I worked in communication and public relations for about seven years before I landed this mommy gig.

4) I have three younger sisters and they are my closest friends. We still fight over clothes.

5) I loose my cell phone almost daily. The most interesting places I have left it include a movie theatre 60 miles from home, the bank of a fish pond, an airplane in Hawaii. Miraculously it has always been returned to me.

6) I was named after the infamous actress Tatum O'Neal but I don't think she was infamous at the time.

7) I've been decorating, creating and designing spaces since I was a kid and I learned it all from my dear mom who is as crafty, creative and hip as they come (she's way cooler than I could ever be).

I'm bestowing this award upon:

Jennifer at Vintage Gwen

No Soliciting {except for Girl Scout cookies} sign


If you subscribe to Groop Dealz, you may have already seen this vinyl sign in your inbox.


Speaking as someone who is down to her last two Samoas, I could really use this sign. I thought it was a good laugh for a Monday morning, and it's only $4 on Groop Dealz today. It might make a good gag gift or real gift for someone depending on how deep their love of Girl Scout Cookies runs.

P.S. I have an easy new project almost finished!

Friday, March 25, 2011

Cheap Sunglasses


Shopping for sunglasses is my subtle way of protesting against the snow that is currently falling outside my window. I never ever ever ever buy expensive sunglasses because I always, always, always loose or destroy them. They may meet their fate by being sat on, washed out to sea or irrevocably covered in SPF film. A life-span of three months is all I require to see my purchase as a success and look forward to the new, cheap and trendy options for the next year.

So here are the cheap sunglasses on my radar this season:

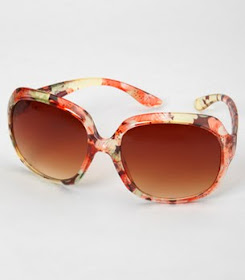
The floral trend is my very favorite.


I love these from Fred Flare,


But if you don't want to wait for them, you can have instant gratification for less than six bucks with these from Charlotte Russe.

And I like the ever-popular tortoise shell from Forever 21


Here is a new twist on animal print and I love the square shape, from Charlotte Russe


These taupe and gold enamel glasses are fun and a little unique, also Forever 21


And I love the shape of these classic black ones


Wednesday, March 23, 2011

Easy Easter Silhouettes


{no fancy digital cutters required}


Is there anything you can't do with a silver serving tray from Dollar Tree? It is my little black dress of crafting materials. I am using the trays in approximately five different projects right now.


This Easter decor project is a little bit vintage with fancy trays and silhouettes, a little bit modern with graphic paper, and a lot of easy.

{ I like just the rabbit alone, but I got carried away and ended up with the Easter trio}


Here is my tutorial, it's so quick and easy, you'll be finished before you can say "Chubby Bunny" with a mouthful of Peeps.


Easy Easter Silhouettes Tutorial


Easy Easter Silhouettes Supply List

Three small silver trays from Dollar Tree
One can of spray paint (satin finish)
Two yards of grosgrain ribbon
Pencil
Scissors
Glue dots or Mod Podge (matte finish)
Printer
Glue gun and sticks
Patterned paper (below are links to the paper I used)


Directions for Easy Easter Silhouettes

1. Spray paint your trays and let them dry (it takes a few coats)

2. Open these sweet little Easter templates from MarthaStewart.com (Thank you, Martha, dear!)


3. Print the bunny template

4. To make all three silhouettes the same size you will need to increase the chick to 135% and rotate to landscape, then print


5. Increase the egg to 135%, then print


6. Cut out the Easter templates and trace them onto patterned paper


7. Cut out Easter silhouettes

8. Attach silhouettes to the trays using either Mod Podge, glue dots or other adhesive of your choice.

9. Hot glue a piece of grosgrain ribbon ( mine is 19 inches long) to the back of the tray to hang it from.


10. Hang your happy Easter silhouettes in a row with tacks. I'm leaving it up to you to decide which goes first, the chicken or the egg?


I am sharing my project on these fabulous blogs this week.


Winner of the Swanky Stitches Giveaway!

I am so excited to announce the winner of the Swanky Stitches giveaway! But I truly wish I could give one to everyone. Drum roll please.....


CONGRATULATIONS, April! Also, check out her fun blog, Frugal Homemaking.

Monday, March 21, 2011

Cupcake Mania!


Good Monday morning, friends!

I am helping to coordinate a party for my church and we are serving cupcakes- so many different cupcakes! So I have cupcakes on the brain. I thought I would share some of the fun and unique cupcake recipes we'll be using as well as some other cupcake inspiration.

The Cupcake Recipes


Cupcake Wrappers

I've posted about these before, but I LOVE these digital templates for cupcake wrappers- they work on any digital cutting machine, and with so many gorgeous scrapbook papers in the world, you can really glam up your cupcakes.


The Internet is full of options for purchasing decorative cupcake liners


The City Pantry has many pretty options (hooray for gingham!)


They come in a package of 12- no baking pan needed (and really, no decorating either since they are so pretty) They are available at K-Mart.


Cupcake Decorating Ideas

The Family Fun website has a lot of fun ideas for decorating cupcakes with your kids.


Also, I love this book that is loaded with unique decorating ideas.


These cupcakes from yeahbaby.com are so simple (looking) and pretty.


Glorious Treats has this cool how-to for making hydrangea petals from frosting.

I Am Baker has AMAZING cake recipes and some great decorating tutorials if you want to get crazy with the frosting tips.


If you have any favorite recipes, decorating ideas or favorite cupcake products, I would love to hear about them. Now, go have a cupcake and enjoy the day!

Friday, March 18, 2011

Flower Box Tutorial: Bringing Southern Charm to My Porch


UPDATE: This project is not just for those with porches! I have been reading all of your wonderful comments and I realized something, I don't want my porch-free friends to feel left out. This project can easily be applied to a regular planter such as this one from Home Depot.

My husband surprised me with a trip to South Carolina to visit my sister a few years ago and it was amazing. I instantly fell in deep love with Charleston, particularly the amazing architecture downtown and at the nearby plantations. I am bit obsessed with architecture and design and the old homes and buildings were so amazing, I had to continually remind myself to breath. There were so many pretty details like these sweet planter boxes, dripping with flowers.


They inspired me to bring a little Southern charm to my own home, on a much simpler scale, of course. I decide to try my hand at some planter boxes that could hang from my porch railing. They were quick and easy to make and you can play along if you like.

Step 1: Purchase two planter boxes. I found these in the Garden Center at K-Mart on sale for about $10 each, but have also seen them at Home Depot and other home improvement stores. I opted for the over rail planter style that sit on top of the porch rail because I thought they would be kinder to my new porch railing, not leaving scuff and rust marks like their metal or wrought-iron counter parts, but I did not anticipate problems with high winds (more on that later). There are many styles of planter boxes, so decide which works best for your porch or windows.


2. Paint the boxes. I used Krylon spray paint for plastic to paint them black. One can covered both boxes (Don't paint the bottoms, the paint will just rub off on your railing).

3. Accessorize. Because I have an uncontrollable urge to embellish everything, I purchased these wooden accents at Home Depot to put on the front of the boxes.


4. Paint the wooden accents with some ivory spray paint.

5. Attach the wooden accents to the front of the boxes. When everything was dry, I used Liquid Nails (learning the hard way that a little goes a long way) to attach the accents to the boxes. If I had to do it again, I think I would used a different adhesive. After a summer of heat and water, the wooden accents were a bit loose (ask an employee at your hardware store what type of adhesive they recommend).

6. Secure the boxes to the porch. In each corner of the planter box is a drainage hole. We threaded a small plastic zip tie (available at hardware stores) through the drainage holes and then wrapped it around the porch rail and secured it.

7. Plant them full of vibrant-colored flowers and pretend for a minute you are downtown Charleston, SC.


Please note: Choose your style of planter box carefully. The planter box grooves were a little wider than my railing and I live in a very windy area and despite my zip ties, on a few occasions, I discovered this...


Amazingly, the flowers survived a couple of these crashes. If I were purchasing the planters again, I think I would buy a style that attached to the porch with some sort of hardware. I have seen the over rail planters work well on some homes, so just decide what works best for you.

I am linking up to these blogs this week: