Monday, January 30, 2012

The best paper organization solution + pretty organizing tools

(folders from seejanework.com)

Paper clutter is one of the banes  of my existence.  I try endlessly to stay on top of it, but at the end of the day, it always seems to be on top of me.  Receipts, statements, preschool masterpieces, medical bills, coupons (that I never use)- if it's paper, it's currently taking over my countertop. This never happens to you, right?

My favorite professional organizer, Kelly Pratt, talked about a great system for managing paper clutter, on my favorite local TV show, Studio 5. She always has a logical approach to organizing and she thinks of everything.

To follow her approach to organizing paper, you need three containers: 
  1. An inbox
  2. A desktop file or easily accessible filing cabinet
  3. A  container for reading materials 
I'll put a link to the t.v. segment that details her paper organizing system, at the end of this post. She has inspired me and I am on a mission for three pretty containers to help me tackle the paper clutter, Kelly Pratt style. Here are a few organizing tools that have caught my eye.

First on the list, an in box. This industrial-looking basket from See Jane Work is pretty great.

This desktop file from The Container Store seems like a practical and pretty solution.  It's metal, meaning it will last and be easy to clean (and re-paint if my hankering to spray paint takes over)


The desktop file is part of the Brocade office collection.  


 You can choose any of these colored hanging files to go inside

My hat is off to my husband who suggested I check etsy for file containers.  I really didn't think that would be a product one would find on etsy, but find one I did and it's really cool- but don't tell him that.
This is a vintage file box: The Dandy File- sadly it's already sold, but isn't it cool? It' so compact and unique- what's not to love?


This simple, colorful file box from See Jane Work comes in a variety of colors and would certainly get the job done.


These patterned magazine files from Ikea would be a good solution for a reading material bin and the matching boxes might work as a desk top file.


 There are so many pretty folders available to fill those filing containers.

  I love the stripes from See Jane Work


Paper Source has some great vintage-inspired folders

 Vera Bradley folders offer loads of color and pattern.

Do you have any sources for great organizing tools?

You can visit the Studio 5 website to read Kelly Pratt's article or watch the video by clicking here. I promise it's worth a few minutes of your time.


Wednesday, January 18, 2012

Simple Organziation for Ribbon


My name is Tatum and I have a ribbon addiction.  I have more rolls of ribbon than I care to count. It is somewhat shameful because I can't imagine that I will ever use them all. Maybe you can relate?

 Lately I've been trying to organize my craft supplies.  Since the giant tangled ball of ribbon hasn't proved to be the most effective means of storage, I've been looking for other solutions.  Thanks to Pinterest, I have my bolts of ribbon hanging from dowel rods on pegboard, much like this (only not nearly so pretty)

(image via Pinterest)


I have loads of ribbon scraps that have for unexplained reasons been separated from their bolts.  I have been trying to find a simple solution for loose ribbon. While I found a few good ideas on Pinterest, they were all a bit complicated and time-consuimg. I wanted a fast and immediate solution.  I shopped my house and decided that clothespins would do the trick.


Pinch one end of the ribbon with the clothespin and wrap the ribbon around the pin and carefully tuck the remaining end in the clothespin opening.  It works best with small scraps.  If you have 3 yards of wide grosgrain it probably won't fit on a clothes pin, but this worked for my scraps. I suggest storing them in a clear container so that you can easily see what you are looking for.  Have you found any other ways to store ribbon?  Please share if you have!

Wednesday, January 4, 2012

Calendar Inspiration for 2012

(image from Yumalum)

Happy 2012!  {I've got to get used to saying and writing that}.  I know most of you are on the ball and probably already have a 2012 calendar, but I am running a bit behind, so I today I'm sharing some 2012 calendar inspiration in case you:
a. Are lumped into that happy group of procrastinators along with me ( go us!)
b. Decide that the eye candy is too delicious to pass up and you need more than one calendar


The first one is possibly my favorite- I am a sucker for florals and these are so pretty!  Oh, and friend, it just gets better, this calendar is FREE!  This is a free download from a blog I adore- Skip to My Lou.  Visit Skip to My Lou for details on how to snag this prettiness.

Etsy has a wide array of pretty options for calendars.  Some are traditional, printed and shipped to you, some are big poster style calendars, while some are files you simply download and print yourself.

This modern calendar poster would be a great way to brighten up  a dull office/cubicle or a craft room.  It is from the Etsy shop, Yumalum, which I adore, with so many great color-soaked prints and posters.


 This beauty serves double duty as a calendar and the most amazing wall art.  It's a printable calendar from Lisa Martino Design on Etsy and a complete and total steal for only $10!  Do you love how they've framed it and made such an amazing display?!


This crisp, cheerful printable calendar is perfect for small spaces and only $5 to download from


For the DIY aficionados and digital scrapbookers, here is a fun photo calendar template from ScrapGirls.  
You can customize colors and patterns and of course, photos. They call it a blend, because you drop your photo onto their template and in blends with the background.  It is only $9.99 to download and you can print it in two different sizes.


Cliched as it may be, I just ordered a photo calendar from Snapfish, though you can bet your sweet bippy, I'll be acquiring a few more of the lovelies in this post.  The photo calendar art work is certainly not as amazing as the others mentioned above,  BUT my photo calendar does feature two of my favorite things to look at: my wild and cunning children. Truthfully, the photo calendar is the closest thing I've done to a scrap book for the past few years and the whole family loves it. In addition to the main photos, you can customize it with photos and text on special days such as birthdays and anniversaries. Snapfish has many calendar sizes, layouts and backgrounds to choose from and you can mix and match designs to your heart's content.  PLUS calendars are 50% off through January 6!  Some of my favorite calendar design styles available from Snapfish are Japanese Flower Garden, Damask and Wild Things.

Thursday, December 22, 2011

A Few Online Family Christmas Traditions to Add

Oh mylanta. I am feeling very unprepared for Christmas this year! I still have many last-minute things to do but I am excited to tie up loose ends and get to the good stuff: driving around to see Christmas lights, decorating cookies with my family and watching a barrage of Christmas movies.  In the past few years we've added a few modern traditions. You may have heard of them, but just in case you haven't I thought I'd share two of our favorite Christmas traditions courtesy of the Yuletide Internet.


1. Elf Yourself from Office Max.


It takes just a few minutes to upload a photo of each family member and fit them to their new elf persona.  Then choose your favorite Christmas song/routine and have so much fun laughing as you watch your elfin family perform spectacular Christmas song and dance numbers-my kids and I giggled at this endlessly (we do every year).

2. Portable North Pole (PNP)


 PNP is so fun for the little ones.  You can visit their site and create a free custom video message from Santa to each of your children!  It takes a few minutes to enter the information to create your video- but it is so worth it when yours kids see a sweet little video of a real live Santa talking to them!


I hope everyone has a very Merry Christmas and happy holidays!

Monday, December 12, 2011

Pottery Barn-Inspired Picture Frames Ornaments {for $1}


Hi friend! I hope you are enjoying the holiday season~  I want to share with you my all-time favorite ornaments: Pottery Barn Inspired Picture Frame Ornaments. I made these a few years ago and they are every one's favorites in our family.


 I loved the frame ornaments every year in the Pottery Barn catalog, so I decided to make my own version.  I frame one picture from each Christmas to hang on the tree.  It is so fun to get them out each year and laugh and reminisce about bygone holidays. In addition to being pretty tree adornments, this project makes for a great family tradition.  Best of all- it's cheap and easy! You can do it in a few hours for as little as $1 per ornament!

Pottery Barn-Inspired 
Picture Frame Ornament Tutorial

Supplies

  • Small frames ( 4 x 6 or smaller- search dollar stores, craft stores or make your own from wood trim pieces)
  • Screw eye per frame ( found at any hardware store or even Wal-Mart))
  • Spray paint ( if you want to change the color of your frames)
  • Ribbon to hang frames with
  • Small photos to fill your frames ( I like black and white photos for this project)
I found my little ornate square frames at Dollar Tree a few years ago and had most of the other supplies on hand. 


Directions

1. Put a screw eye in the top of the frame  ( I recommend wood or plastic frames). I can't lie, this took a bit of muscle to get the screw eye into the plastic frame- wood is the easiest material for this project.
2. Spray paint the frame and the screw eye ( take the glass out of your frame first)
Use a program like Picasa or Photoshop to re-size and print your favorite Christmas photos to fit your frames (I like to print the year on the photo too)


Thread some festive ribbon through the screw eye and tie it on the tree!


I am linking up this project to  Wow Us Wednesdays at Savvy Southern Style and these great blogs.

Monday, December 5, 2011

Little Girl Bedroom Re-design


I wish I could tell you that I've been hard at work and just finished this sweet room, but my only contribution to this  project was helping my good friend, Heather, deliberate over paint chips. I am excited that she is kind enough to allow me to post pictures of her daughter's Big Girl Bedroom re-design! With a sweet little baby arriving next month,  there is a bit of bedroom shuffling going on at her house. So she's re-designed this bedroom, and is in the process of re-designing the nursery and is in the early stages of building a brand new bedroom for her boys- how is that for nesting?! 

I don't have a before picture of the room, but it belonged to her two boys.  It was a darling room, but definitely all boy, with darker colors. She painted all of the walls and the ceiling and added trim to the window and board & batten using this tutorial from the blog, JennaSue.  The paint colors are all from Behr: Clam Chowder (Yellow), Raspberry Lemonade (Pink), and Marshmallow (White)- yes, the pregnant lady freely admits she chose all paint colors with food names ;)

Here are some of the fun details. 

The darling quilt and sham are from Company Kids.

Heather made this sweet little accent pillow with fabrics from JoAnn's.


Heather sewed a valance with polka dot green ruffles (fabric from JoAnn's)

This lamp was made by Little Miss A's daddy when he was in 6th grade shop class.  Heather spray-painted the base and covered the shade with fabric and added some fabric flower embellishments (all fabrics from JoAnn's.


Using fabric left from the other projects and a little inspiration from Pinterest, she made this fabric wreath.


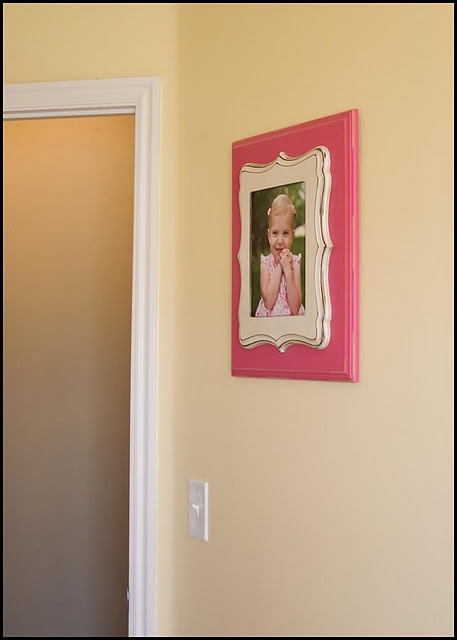
The picture rod is from Rod Works.  The frames are from The Organic Bloom. It has to be said that my friend Heather is mildly obsessed with Organic Bloom frames (they pop in a few more places in this room)...this is an obsession she has passed on to me;) If perchance, the obsession has rubbed off on you too, Heather sells these frames, so contact her to purchase them!
The shelf came unfinished from Robert's and Heather sanded and painted it. The big letter "A" is a cardboard letter from JoAnn's, painted green with acrylic paint.

She added these sweet little polka dot ceramic knobs from Hobby Lobby to the shelf.

This is hands-down one of the best kid (or adult) dressers.  I think buying kids furniture is always a dilemma. You want it to look good, you want it to last, but you don't want to spend a fortune. This dresser  is part of the Birkeland collection from Ikea. The warm white color is perfect, the construction is good,  it is short enough for little people to reach, the drawers glide with ease and it has loads of room- ever since I saw this one in action, I've been trying to figure out how to fit one in my daughter's room. Heather also bought the Birkeland nightstand (that is where the cute lamp lives).

Another Organic Bloom frame- so fun!


The fun and functional storage cubes and colored bins are all from Martha Stewart's line at Home Depot.


There is one happy girl that now lives in this candy-colored bedroom.Thanks, Heather, for sharing your photos!

P.S. One more Organic Bloom frame ;)