Wednesday, June 29, 2011

Quick and Colorful Kids' Garden


Necessity is the mother invention and I am the mother of a compulsive flower-picker.  So what started as a bit of a problem, turned into a great summer project for our family.


This is my daughter, then three years old and passionately caressing our spring blooms. To say that my girl loves flowers would be a big, tulip-hugging understatement. While it's pastel tulips she loves in the Spring, she favors pink Martha Washingtons in the Summer and adamantly insists on orange pansies in the Fall.  While I've been happy to oblige and plant her favorites, I soon learned that the favorites didn't last long. She would secretly and lovingly pick each bloom.  In an effort to cultivate her love of flowers and still protect my peonies, our solution was to make her very own garden where she could plant, dig and pick to her flowery little heart's content.  We loved this project so much, it has become a summer tradition.


By helping your kids make a small space in the yard specifically for them, you can keep them entertained this summer, teach them responsibility, increase their confidence and keep your plants intact. This project is very simple and completely customizable to your budget and your space ( you could even do it in a pot or planter box if you don't have a yard).


As I mentioned, this is a project we've done before.  
                            
Last year we started with a big kids' garden full of marigolds, petunias, tomatoes, pumpkins and zucchini all enclosed in a perfectly pink picket fence.  My mom, a true gardener, even helped out. It was a lot of fun, but since we are in the midst of landscaping this year, we've down-sized the kids' garden and relegated it to a small, dusty, yet-to-be-addressed, corner of the yard.  Kids don't seem to mind where the garden is or how big it is, as long as it's theirs.


Kids' Garden Supplies

  • 1-2 packages of garden fencing, available at gardening stores, Home Depot, Lowe's, and Wal-Mart ( the amount you will need depends on how big you plan to make your garden).
  • 1-2 cans of spray paint ( let your kid choose the color, of course)
  • Flowers, plants and/or vegetable plants of your child's choosing
  • Gardening supplies: little shovels, gloves, watering cans, etc.
  • Optional: a personalized garden sign, garden ornaments (finally, a home for the lawn gnomes that didn't sell in last summer's yard sale).


Instructions to Make Your Kids' Garden


  1. Parents spray paint the fencing on a drop cloth or scrap of cardboard and let it dry.  Two or three coats on each side should do the trick (we left our fence out in the elements last winter, so it's looking a bit rough and definitely in need of new paint). 

2. Mark out the spot where your fencing will go and set it aside.
3. Help your kid(s) plant their plants within the marked area.
4. Together, put up the fence around the plants and secure it ( you can attach the fence sections to each other with plastic zip ties if they won't stay together).
5. Kids can add a sign, a garden ornament or stepping stones and decorate it-this is their space!
6. Enjoy a summer full of adventure, ooh and ahh at each day's new blooms and maybe even sample some summer vegetables!


Kids' Garden Tips:

  • Remember the kids are calling the shots on this one.  Let them make as many of the choices about the garden as possible.  This gives them a feeling of ownership over their garden and confidence by allowing them to make the decisions.
  • Have the kids do a little research before buying their plants.  Using the Internet or books, and your guidance, they can learn which plants are compatible in your zone, which prefer sun or shade, etc. (they'll be learning without even knowing it).
  • Let the kids add some vegetable plants. It's much simpler than a full-blown vegetable garden, but with the benefits of learning about growing your own food ( this also makes for more fun summer activities like finding recipes that will use up the 10 lbs of zucchini you've surprisingly grown in that little kid garden).
  • If you've got a flower-picker on your hands, consider a cutting garden made up flowers that bloom frequently.
  • Resist the urge to water their plants for them, unless they are really little. A garden is a great way to teach responsibility and help them understand the consequences of their actions: bright, beautiful blooms or burned up begonias. 


Sunday, June 26, 2011

Coffee Table Quote Book Entry No. 4

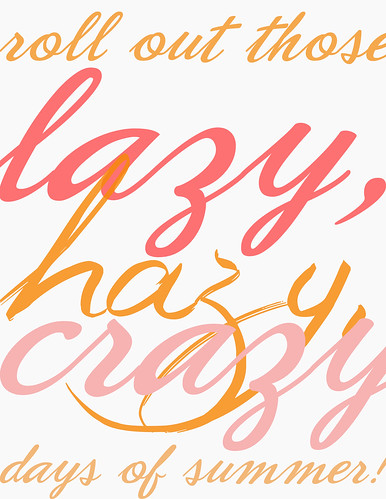
Summer is finally here and we are more than ready at our house!  In honor of my favorite season, I'm adding a new entry to my Coffee Table Quote Book.  This one is from the Nat King Cole song, Those Lazy Hazy, Crazy Days of Summer, that my grandma used to play for me on a 45 record, if you can believe it.  It's the song that is old, not me ;)  This seemed like a perfect addition to the book and the perfect printable to welcome summer!  You can print it for personal use if you like, but please, indulge me and listen to the song on i-tunes if you have a minute.  It will make you smile.
summer


Monday, June 20, 2011

Dollar store milk glass

 Hello, friends! I hope your weekend was great.   I have had plans to display a collection of milk glass above my kitchen cabinets for ages, but collecting milk glass takes time, so that project is a work in progress. Meanwhile, I have seen a few projects in the blogosphere where people have simply painted regular glass vases, containers, dishes etc, with white spray paint to get the look. Brilliant! I have plans to try this too. In the meantime, these glamorous plastic items from Dollar Tree caught my eye and I decided to paint them just for the fun of it, just to see what would happen.  


I bought a serving platter and vase.  I sprayed the vase on the inside only.  I found that keeping the spray paint can a good distance from the vase, prevented drips.  Short puffs of spray paint will eventually coat the inside completely.  Whenever I got inpatient or tried to angle the can to cover a specific part, the paint dripped. Drips aside, I think the result was pretty fabulous (I also think it's time to try colored spray paint on plastic vases next).


 I did make some colossal mistakes that are equally important to share. I started with the platter and did it all wrong.  First, I grabbed my satin finish spray paint by mistake.  The finish is awful!  Milk glass is supposed to be glossy.  Use high gloss or semi-gloss spray paint. The satin white finish just seemed to mock my cheap, tawdry platter.  Next, I painted the wrong side. In my opinion, it looks more realistic if you paint only the smooth side of the object, not the intricate cut side.  This is an opinion I formed after having painted the detailed side of the platter.  Live and learn.


So short puffs of glossy paint on the smooth side of your plastic will give you a milk glass look faster than you can raid your grandmother's china cabinet!


I am linking up to Wow Us Wednesdays at Savvy Southern Style and these great blogs.

Wednesday, June 15, 2011

Oh buoy, he's one! {whales and sails birthday party}


Despite my objections to the contrary, my baby boy turned one, friends. I wanted his first birthday to be special and memorable, but still relatively simple. So I employed the help of some clip art, a trusty printer and some very basic party supplies, to whip up a sweet, printable, personalized first birthday party with a whales and sails theme.

Basic supplies:

Polka dot plates, napkins and blow-outs from Dollar Tree

Cups, balloons and colored plastic utensils from Wal-mart.


As I mentioned, I chose an ocean/nautical themed party.  I originally began looking on party supply web sites for decorations, plates, cups, etc. with that theme.  They can be found, but I wasn't in love with any of them and there is a hollow feeling that comes from spending more on paper plates and disposable tablecloths than say, your utility bill...or shoes. So I opted to make my own party supplies to get the look I wanted and be able to personalize the items.  

I started hunting for clip art I could use to design and print party decorations.  I discovered that Etsy is a great source for clip art-who knew?   I found this sweet little nautical clip art set from Pink or Blue Designs and purchased it for $5.
Jana from Pink or Blue Designs was so great to work with and so fast and accommodating.  I had my clip art files almost instantly after paying for them. If the thought of using Illustrator or Photoshop or doing any DIY projects on the computer terrifies you, DO NOT DESPAIR! You can find a myriad of pre-made printable parties online. Pink or Blue Designs has some darling options and there are many to choose from on Etsy as well. In addition to convenience and cost savings, printable parties are great because you own the files and can re-print them for another party or other use.

Getting back on track, I started by making the party invitations.  I made them using Adobe Photoshop.  The design is pretty basic with some stripes in the background, circles to look like portholes and the clip art...oh and a photo of my sweet little guy. 


I liked the stripes and port holes look, so I incorporated those elements along with the number one in with the clip art to make the designs for the rest of the party.


I made birthday bouquets by simply printing out the designs, cutting them and taping them to bamboo skewers. I tucked them into patterned containers ( baby formula cans covered in patterned paper that I also made from the clip art).  I used the formula cans for a few different purposes.  It seemed fitting since we are celebrating the end to buying formula!


I framed a very simple little welcome sign with a few nautical puns...
  

I found some blow-outs at Dollar Tree that were the right colors, so I taped some of my clip art circles over them too.


I taped another happy little whale to the front of this clear plastic napkin holder from Dollar Tree and used it to hold the plates.

Let's talk about cakes.  In short, my talents lay elsewhere, but I still wanted to make a cute cake.  So I cheated.  Really, who made the rule that everything on a cake has to be edible? I wrapped the base in 1/2 yard of ribbon (the frosting held it in place) and made a quick birthday sign printed on card stock and taped to a bamboo skewer to top the cake. With a classic number candle, the deal was done. Fast, cute and removable for when my son destroyed the entire cake, per first birthday tradition.

Once upon a time I made this little dessert stand.


Once upon another time, I broke the top layer off.  It turned out to be a happy accident.  I needed two stands for the party, so I stacked my severed stands on some simple red platters from a very exclusive store called Wal-Mart. Done and done.

I forgot to get a good photo, but in the bottom left, you can see the star-covered formula can that I filled with napkins and utensils.

I added personalized cupcake toppers as well.  Clearly, I went overboard with the clip art circles on bamboo sticks idea, but I like it anyway.  We served strawberry cream cheese cupcakes with cake batter ice cream and grasshopper cupcakes with mint chocolate chip ice cream.


  Speaking of ice cream, here is a cool trick that I discovered: Dreyer's round ice cream containers....


...fit perfectly inside decorated formula cans- who knew?  It was a fun way to serve the ice cream in a decorative but simple container.
To dress up the plain paper cups, I made and printed little drink wrappers that are very basic, then cut and taped it to the paper cups.


The birthday banner was my favorite part.  I originally planned to make a pennant banner but two things stopped me: 

1) It's been done (by me and thousands of other DIY aficionados).
2) I ran out of time.  The though of cutting, gluing layering and stringing more shapes together was more than I wanted to tackle.  I am lucky to have access to a big printer, so I used essentially the same design as the invitation with a few changes and made it approximately one billion times larger. The banner was 26 in by 30 in.


Whether it was the decor or the unrestricted access to his own cake that won him over, Asher was impressed with the party.

Tuesday, June 14, 2011

Grasshopper Cupcakes

I have a few fun and simple birthday party ideas to share with you very soon! In the mean time, here is a tip to make plain cupcakes a little more exciting.

I poured my devil's food cake batter in a cupcake tin and then added a grasshopper cookie to each baking cup and baked the cupcakes.  I crushed the remaining grasshopper cookies in a re-sealable bag, frosted the cupcakes with chocolate frosting and sprinkled crushed cookie on top.  They were a hit and a very quick to throw together.  I served them with mint chocolate chip ice cream. Three cheers for the fabulous combo of chocolate and mint!

Saturday, June 11, 2011

Strawberry-Cream Cheese Cupcakes Revisited

Hello friends!  I feel like I haven't done a proper DIY project in ages.  I have many started, a few ruined, and none finished. I'm attributing it to holidays, birthdays, dance recitals, graduations and all of the fun late-spring/end-of-school activities that seem to fill the calendar this time of year.

I am working on my baby's first birthday party today, so I should have pictures to share soon.  I am making strawberry cream cheese cupcakes for the party with a slightly revised recipe from the last cupcake party, so I thought I would share.

My friend, Birgitta, made strawberry cream cheese cupcakes for a party we had at our church months ago and they were fabulous- a party in your mouth! I even saved a few cupcakes for breakfast the next morning which, by the way, is a fabulous way to start the day.

She used the Betty Crocker recipe for the cupcakes. Birgitta improvised with her simple and fabulous frosting recipe, which was better than any store-bought frosting in a plastic tub (sorry, Betty).

Frosting
Small package of instant pudding (cheesecake or cream cheese flavor)
1 cup milk
1 tub of whipped topping (Cool-Whip)

Combine milk and pudding as directed on the package. Once set, fold in whipped topping. Frost cupcakes and put them in the fridge to set. Garnish cupcakes with strawberry slices. Save some for breakfast ;)

Tuesday, June 7, 2011

Recipe for off white spray paint


Marshmallow, ivory, bone, vanilla, shell, milk, there are more shades of white than there are reruns of Sponge Bob on Nick Jr.  I favor a warm white, as I like to call it.  It's not as stark a pure white, it's brighter than ivory, but with less color than cream (too say that I am picky about color would be an understatement).  Unfortunately, my favorite paint medium, spray paint, is not readily available in cloud or almond any variation other than bright white or ivory.  I dream of a world where people can one day walk up to paint counter, hand over a paint sample, and say "I need Cherries in the Snow, satin-finish, in a spray paint can, and make it a double, please!" Until my dream comes true, here is my solution to achieve a warm white color with the smooth finish of spray paint.  Are you ready for an intense tutorial?

Materials

  • One can of white spray paint
  • One can of ivory spray paint
  • Something to paint


1.  Completely cover your object in white spray paint, filling in all of the nooks and crannies ( this will take a few coats).

2.  When dry, spray one light but even coat of ivory spray paint over the top.

3. That's it.
(it's hard to illustrate the color difference in a photo, but believe me fellow color snobs, there is a difference!)

I know it sounds weird to mix colors but since spray paint is such a fine mist, and the colors are so similar, it is hardly noticeable. This works best on flat surfaces like picture frames. Items with a lot of detail and nooks and crannies make it harder to coat evenly.  I have not tried this on a big object, like a piece of furniture, the difference may be too noticeable, but having used it only on frames and little knick-knacks, that hang far from a scrutinizing eye,  I've been happy with the results.

Have you ever mixed spray paint?  How did it turn out?

Saturday, June 4, 2011

Organic Bloom Frame Giveaway at Heather Taylor Photography Blog!


Friends, this is your chance to get your hands on one of these sweet frames from Organic Bloom that I mentioned previously.  The wonderful and talented Heather of Heather Taylor Photography is giving one  5x 7 frame away so go check it out!  You get to choose the style and color too. You have until Monday to enter.

Friday, June 3, 2011

Coffee Table Book Entry No. 3 {free printable}

kungfupandaquote


Hello, friends! Things are looking up here.  The sun is out and I've taken advantage of one of the advances in modern medicine known as antibiotics.  Life is much better.

Here is my latest installment in my Coffee Table Quote Book.  The inspiration for this one may or may not have something to do with the fact that Kung Fu Panda was on continuous loop at our house this week.  It is one of my very favorite movies and this is one of my favorite lines from the movie.

You can print if for personal use if you like.  Happy Friday!

Thursday, June 2, 2011

A New Winner of the Burlap Pillow Cover!


Hi friends!

I never heard back from the winner of the burlap pillow cover from the BeiFIORI Embellish giveaway- darn it! So I have drawn a new winner.  Drum roll please....


Congrats to Jessica from My World- Made by Hand!