Saturday, April 30, 2011

Patterned photo mats


I've had this idea floating around in my head for months for a patterned photo mat and finally made time to try it.  I really love patterned paper and photo mats and I thought the two should get together. It is a great way to add some interest to otherwise plain frames. I used it to frame my Mothers' Day Text Art projects that I made for the many mothers in my life.  You can read how to make them here or here.


 You may wonder why one needs to attach patterned paper to a photo mat when one could just use the paper in place of the mat? To that question, I have three answers:

1.  The photo mat provides structure
2.  The photo mat provides depth and interest
3.  I've tried it without the photo mat and it just looks less spectacular

On the easy meter, this project rates somewhere between ridiculously simple and surprisingly fast,  so gather some supplies and give it a go.


Friday, April 29, 2011

Mothers' Day text art ( guest post at thrifty decorating )


Hi friends!   I am over-the-moon excited about this project.  It was so much fun! Warning: You will become addicted to this project and begin searching for additional mothers to make artwork for. I went completely overboard making up designs.  I did a guest post on this project at the fabulously thrifty blog, Thrifty Decorating ( thanks, Nikki!) and have also posted the full project below.

Mothers' Day Text Art

Mothers' Day is sneaking up on us, friends, and I have a fun and simple idea to honor the mother(s) in your life and win you some major brownie points.

I consider myself a student of Nate, meaning I watch the Nate Berkus Show religiously.  If you are a fan too, you've probably heard him preach that your decor should be more than random pretty objects, it should have personal meaning.  I wholeheartedly agree.  So I took inspiration from one of my favorite trends, word art and number art, to create some decor pieces for moms that would have real meaning.   I made text art out of their children's and grand children's names and birth dates.  The concept is pretty basic, but the possibilities are limitless.  Combine some pretty fonts with great colors and the names and/or dates that are most important to your mom, put it in a pretty frame and you've just guaranteed your spot in the will.


Here's what you need to make your own Mothers' Day text art 
  • A printer or access to a copy/printing store
  • White card stock
  • Picture frame


There is not a formal tutorial for this project.  The only instructions are to open your word processing program or Photoshop, type your names and/or dates,  and play with different fonts, sizes, colors and placement and just be creative and have fun.


Tips for Making Mothers' Day Text Art
  • Start with great fonts. The font(s) you choose will set the style for your piece.  Your choices are endless from retro, to distressed, handwritten, modern, or calligraphy styles- find the ones that reflect your mom. Sites like dafont.com have a lot of great fonts to download for free!  Here are some links that explain how to install a new downloaded font on Windows or Mac (it's much easier than you think).
  • Don't be intimidated.  Say it with me, "I can do this project!"  You don't need a background in graphic design or amazing computer skills to make text art.  If you can type, change the size and font style of your words, you can do this.  If you need some creative inspiration to get you going, check out sites like tinyprints.com or photoaffections.com that create invitations and announcements, they have great ideas for word art.
  • Choose your frame first.  The frame you use will determine the size of your artwork ( 5 x7, 8x10, etc).   This is especially important if your frame is an irregular size. The frame can also help you choose the style and colors you use in your artwork.
  • Print wisely.  Print your artwork on card stock to give it a more professional look. If your artwork has a lot of color (see image below), that will require a lot of ink, I recommend taking it to a copy or printing store where they can print a nice smooth copy, free of flaws (and save your toner cartridge on your home printer).  It cost me about 70 cents per 8.5 x 11 sheet to print my artwork on card stock at my local copy store.


Here are some examples of Mothers' Day text art I have created.  I have used a good old word processing program for some and Photoshop for others, but all designs are very basic. I am happy to answer any questions you have, so feel free to contact me. Below each example I have listed the name of the fonts I used in case you want to download them (fonts without links are standard fonts already installed on most computers).

 {Fonts are Lobster and Jellyka Bee's Antique}


{Font is Walkway}

{Fonts are Hoedown, Jellyka Western Princess, Orator Std, Zapfino and Carnevalee Freakshow}


{Font is Payday}


 {Fonts are Honey Script, American Typewriter, Viper Nora, and Budmo}


{Font is Viper Nora}


{This is a great design for a mom with LOTS of grandchildren.


{Font is Viper Nora}
{Fonts are Walkway and Payday}


This weekend I will also be sharing some fun and simple ways to frame your Mothers' Day text art.  I am also hosting a giveaway for a burlap pillow cover from beiFIORI Embellish which you are welcome to enter.    Thanks for reading and have a great weekend, friends!  


Wednesday, April 27, 2011

The Next Best Thing for Summer


I was thrilled to see the Spring/Summer clothing line from Next Direct, it made me believe that Summer  is more than just a myth.

Have you ever purchased from Next? I bought this jacket and these shorts for my baby boy a few months ago and I have been impressed with the quality.  My order arrived very fast, within 48 hours.  My only complaint is that the jacket, a size 12-18 months, was really big on my baby.  He wears this size in many other brands ( he is a BIG 10-month-old) so I was surprised how big the jacket was (hoping he will grow into it for Fall).  The shorts fits great.  I will definitely purchase from them again.

I have yet to try their women's or men's clothing lines. Has anyone else?  Here are a few Next items on my radar for Summer...and when I say "a few," I mean one hundred.


Monday, April 25, 2011

A home for the leftover jelly beans


Hello, friends!  I hope everyone had a great Easter weekend.  I am a little sad that one of my favorite holidays is over, but am taking comfort in the grocery store clearance aisles full of Easter candy. Speaking of left over candy, how about a cute way to display it?  My mom, the craftiest of crafting divas, took a page from our beloved Martha's book and made these sweet little favors to adorn her table for Easter.


Martha Stewart-Inspired Daffodil Candy Cups


Supplies

  • Patterned paper
  • Mini cupcake liners
  • Left-over Easter candy
  • Scissors
  • Adhesive
  • Printer

Martha came through for us again with her great templates.  My mom printed this template from MarthaStewart.com, traced it onto patterned paper and cut it out.  She glued a cupcake liner to the center of the flower and filled it with sugary goodness.  It doesn't get much simpler or much cuter.  It's a great way to add some color and Spring whimsy to the table especially since things are feeling a bit dull with the Easter decor gone.

Friday, April 22, 2011

Spring Pancake Art

We had far too much fun with this project.  By filling squeeze bottles with colored pancake batter, you can draw just about any shape you can imagine and enjoy colorful pancake perfection. 


Thursday, April 21, 2011

Free Spring Subway Art?!


Have you heard about Very Jane?  I just read about them over at U Create, where they are currently sponsoring a giveaway.   Very Jane is a brand new deal a day site focused on boutique items and to celebrate their launch, they are hosting free deals daily for two weeks!  I just downloaded this fun Spring subway art print. How fun! You can find all of the info at U Create. 

Wednesday, April 20, 2011

Fabulous spring flats


Just in time for Easter Sunday, how about some pretty Spring ballet flats?

 I bought some sweet little basic white ballet flats for my four-year-old from the fancy French store they call Target.  Immediately, I decided they need a little brightening up for Spring.


If you have some fabric and ribbon scraps and a pair of  bored ballet flats, you can have delicious little Spring shoes in no time ( a grown-up version would be great too)!


Monday, April 18, 2011

quote of the week and font of the week

Good Monday morning, friends! Really, it's Monday already? Did you have a great weekend?  Mine was filled with almost-blooming tulips (not complaining, I'll take whatever I can get ;) and some much-needed shopping, though one could argue that shopping is always much-needed.

I am looking forward to  an action-packed week, and when I say action-packed, I mean riveting adventures like sorting through medical claims and decoding insurance benefits, scheduling a vast array of appointments and getting landscaping bids, but with a few pleasantries mixed in like last-minute Easter details, Mother's Day projects,  party planning and a girls' night out (hooray).

Are you growing wheat grass? How is it coming along?  Thank you to those who have shared their wheat grass adventures with me- it's strangely exciting, isn't it?!

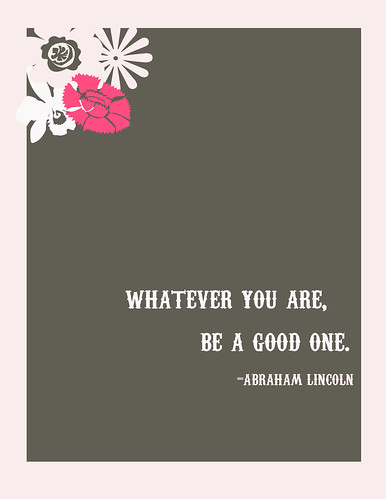
I am a collector of words, particularly words written in pretty fonts.  I love a great quote, a deep thought or a verse from a favorite song- but who doesn't?  I am working on a coffee table book filled with my favorite quotes and favorite fonts, so I thought I would share today's installment that I just whipped up in Photoshop.

This quote is from U.S. President Abraham Lincoln.  The font is Carnevalee Freakshow. 

Feel free to print it if you like (for personal use only, please).

QUOTE OF THE DAY


Coincidentally, I just saw the movie The Conspirator about the Lincoln assassination-wow!  See it- that is all I can say.  I am linking up to Wow Us Wednesdays at Savvy Southern Style and these awe-inspiring blogs.

Saturday, April 16, 2011

Jewelry Organiztion Ideas

For every women who has spent more than 20 minutes untangling a knot of  of necklaces, or been forced to turn a lonely single earring into a broach, how about a little jewelry organization inspiration?  Today I am featuring some great bloggers with some really smart jewelry organization ideas that all have two components: simplicity and style.  I love that each project showcases the jewelry rather than hiding it.  Jewelry is pretty.  That's why be buy it.  So three cheers for putting it on display, and three more cheers for finding simple ways to do it!


I've never admired chicken wire so much as I did when I discovered this DIY jewelry holder  from Life.Love.Larson.  Hooray for old window frames!


Homemade by Jen wooed me with the pretty paper she used to line a cutlery tray to make her jewelery organizer.  You can read the tutorial here.


It helps to have a pile of pretty necklaces to adorn this sweet necklace hanger.  You can read how to make both from the lovely NatSprat.  The big white rosettes are so simple and have such impact.  The simplest ideas truly are the best.


I think you may start piercing every piece of tin in your house when you read about the Tin Pail Turned Earring Storage from Christine & Co. No metal object is safe in my house any longer.

If your favorite crafting supply is your credit card, might I suggest this sweet little birdhouse jewelry tree.


JC Penney has it in a metallic finish.

Urban Outfitters carries one in white  in a little smaller version, and for a lower price (don't try to understand it, just enjoy it).

If this little bird and it's jewelry tree came to live with me, they would likely find themselves transformed to a lovely shade of aqua or yellow compliments of a can of Krylon spray paint.

There you go, friends, a handful of jewelry organization inspiration for your weekend!


Tuesday, April 12, 2011

quick spring jacket upgrade : from delightful to super delightful in 25 minutes


Question: What is wrong with this jacket?


Answer: Not a thing

I bought this cheery Spring pea coat for my daughter from Old Navy.  It's cotton knit,  cute, comfortable, perfect, still I couldn't leave it alone.  Maybe it was a longing for Spring flowers or my uncontrollable urge to embellish everything, but I simply had to add some brightly colored fabric flowers to the jacket.  I gathered some colorful fabrics from my stash, got to work and in a short time, the Old Navy jacket was upgraded from cute to deliciously cheerful!


If you have the same need for color and uncontrollable urge to embellish, gather these supplies and play along:

  • two scraps of polyester-blend fabric in different colors (I used satin in 1/8 yard strips)
  • denim fabric scraps
  • scissors
  • fabric pen or regular pen
  • glue gun
  • tea light or candle
  • Drinking glasses in various sizes or other round items to trace
  • beads, buttons or jewels for the the middle of your flowers
  • 1-2 bar pins or safety pins
  • Small piece of felt to back the flowers ( it helps if the felt is the same color as your jacket)


Quick Spring Jacket Upgrade Tutorial: 
From Delightful to Super Delightful in 25 Minutes


1.  Make two melted flowers from your two different colors of poly-blend fabrics. Make one slightly larger than the other (click here to read how to make melted flowers).


2.  Make three pinwheel flowers, all the same size, from your denim fabric (click here for instructions to make pinwheel flowers).


3. Cut a circle out of your felt just big enough to hold all of your flowers.


4.  Attach all of the flowers to the felt circle using hot glue.  Place the flowers as close together as possible or even overlap them so that the felt isn't visible between flowers.  Try to glue almost the entire back of the flower to the felt  so the flower won't droop and flop when you hold the felt up.


5.  Cut off any felt edges that are visible from the front.


6.  Add a bar pin to the back of the felt using hot glue or you can just use a safety pin to attach it to the jacket.  If your flower pin is extra large, you may need to use two pins (top and bottom) to hold it in place.


7.  Attach your cheerful little upgrade to your jacket and notice how you suddenly have sunshine on a cloudy April day.


I am sharing my project on Savvy Southern Style and these blogs this week.

Burlap Pillow Cover Giveaway from beifiori Embellish!

UPDATE: The contest is now closed, but you can find these products and more in the Etsy shop, beiFIORI Embellish.


There is a change to the burlap pillow cover giveaway from BeiFiori Embellish. We are so excited about this giveaway, we decided to draw a winner now that the Bei Fiori Embellish Facebook page has reached 50 likes, rather than waiting until they reach 100.  This is your last chance to enter.  The contest will end at Midnight Mountain Time on Monday, May  23, 2011 and the winner will be drawn and announced on this blog on Tuesday, May 24, 2011. Read on for instructions on how to enter the giveaway.


Remember the darling Etsy shop beiFIORI Embellish?  They sell sweet clothing, accessories, totes and home decor, including pretty pillow covers. Well, the lovely Marilyn of beiFIORI Embellish is graciously giving away one of her burlap pillow covers on this blog! I know, I'm excited too!


Giveaway Rules


1. Leave a comment on this post letting me know you are a follower of Keep it Simple, Sister  and that you would LOVE the burlap pillow cover.

2.  "Like" beiFIORI on Facebook and leave a second comment letting me know that you are a fan of beiFIORI on Facebook.

When the the  the beiFIORI Facebook page reaches 100 likes, a winner will be drawn at random from the comment list on this post and announced on this blog.  Enter quickly for your best chance to win!